Eric Winn
Zen MBB Master
Here is a quick, down and dirty aluminum rack frame I made to hold my Bachetta Brain Box (BBB). I used this during the 2013 N24HC and it worked very well. Materials cost was roughly $15 to $20.
My next plan is to figure out quick release mounts so I can quickly remove and install the rack frame on the headrest for when I don't want to ride with the BBB.
Long term plan is to build a quick release rack frame mount for a narrow custom bag similar to what John did for Maria's RAAM bikes sourcing material from something like this DIY Gear Supply store.
I originally slipped the mount pocket of the BBB over the entire Vendetta headrest but found these issues:
Trial fitting the old clamps to the approximate position I thought I would use them in to determine how I would mount a rack frame to them:
alt="Trial fit of old headrest clamps"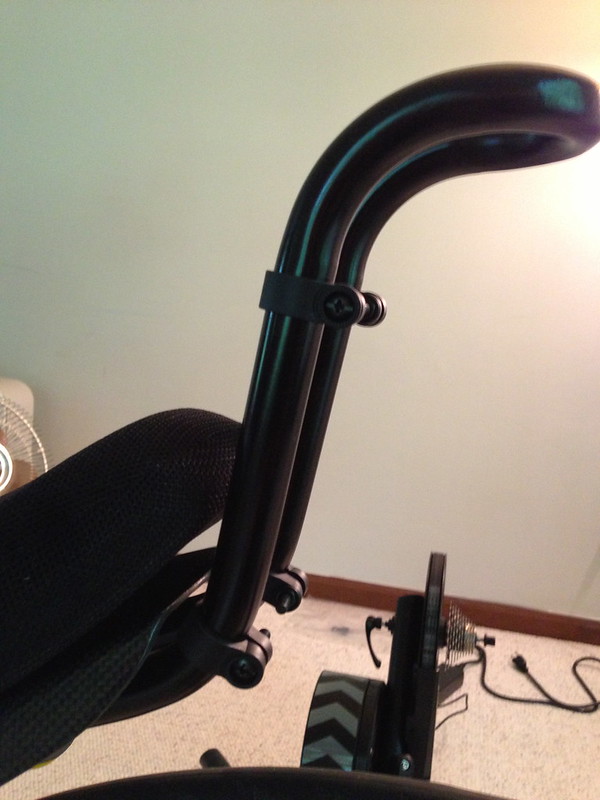
I then measured the mount pocket of the BBB and cut out an oriented strand board (OSB) template:
alt="Oriented Strand Board template"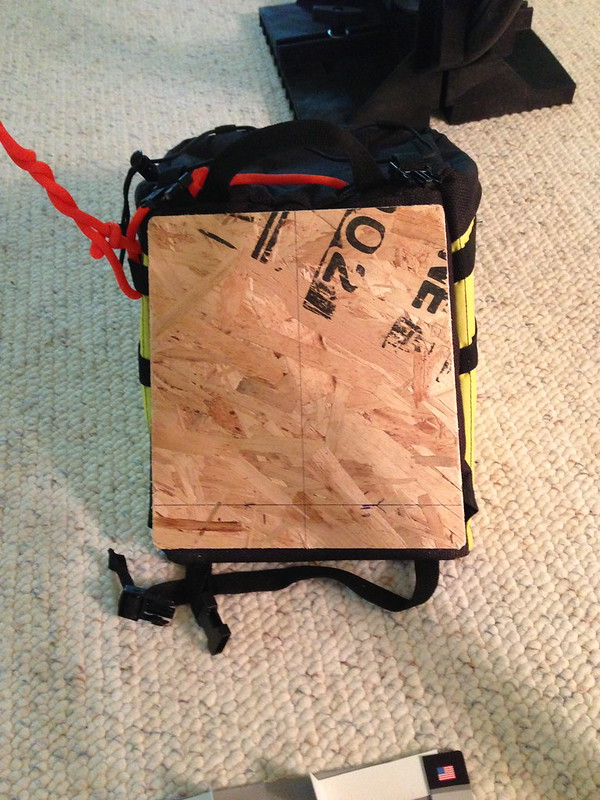
I did a number of test fits and trimmed the board a bit more until I was happy with the fit. Then I used some cardboard strips from my Gear Tie packaging to mock up an aluminum framework. I did this before buying 3/4"x1/8" flat aluminum bar stock at Home Depot. I again trial fit using the aluminum flat bar stock, especially since it was thinner than my test template cut from OSB.
alt="flat aluminum bar stock trial fit"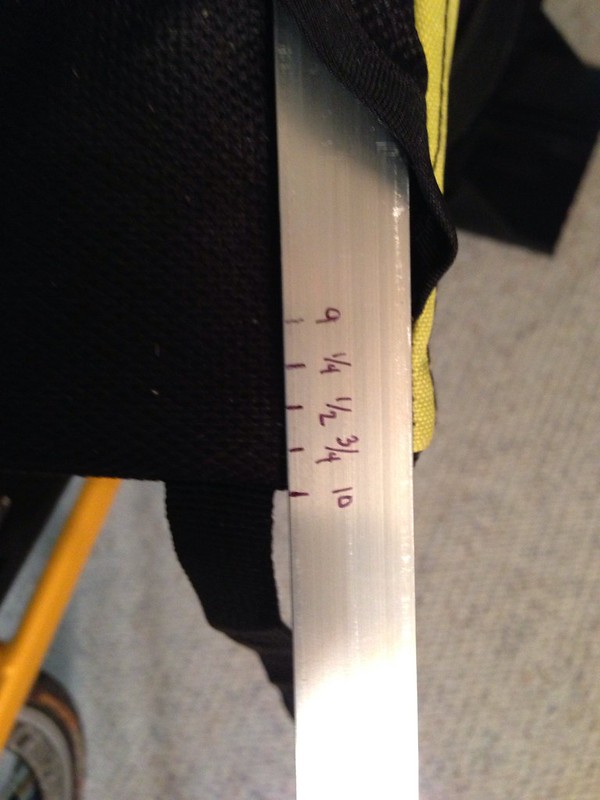
Once I was satisfied with the dimensions, I cut the bar stock into 2 side pieces at 9 3/4 inches long. A top piece at 8 3/8 inches long and a bottom piece at 9 3/8 inches long:
alt="aluminum bar stock lengths"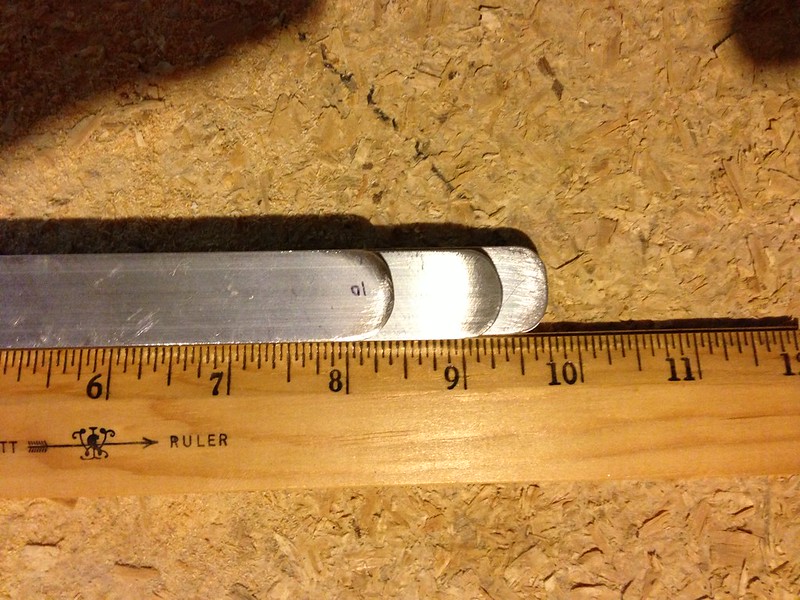
I used a penny to mark the end radius and then filed and sanded to get the rounded edges:
alt="penny to mark edge radius"
Then drilled and pop riveted the main frame pieces together. I already had a pop riveter but they can be picked up for under $20 if you don't have one. Just take care to understand rivet sizes and material and limitations of the pop riveter. For example, I used aluminum 3/16 inch 5mm rivets for this project. The same size rivet in steel will typically require a much more expensive riveter. The riveters in this price range will typically handle smaller steel rivets if you are working a steel project. You should not mix metals or you will induce galvanic corrosion.
alt="main frame construction"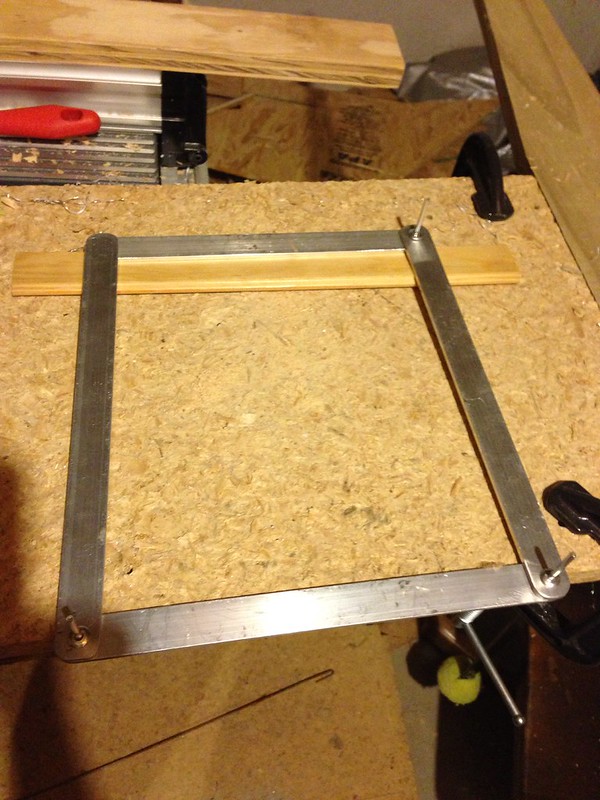
Once the perimeter framework was together, I held this against the backrest to determine mount tab sizes and positions and then added the bottom mount tabs. NOTE: I already had a small sheet metal brake that I had picked up at Harbor Freight several years ago on sale for around $35. A sheet metal brake is a device for making bends in sheet metal. It worked well for this flat stock giving me very precise bends for the mount tabs. The bends turned out better with this 1/8 inch thick stock when I bent the aluminum slowly.
alt="bottom mount tab being riveted"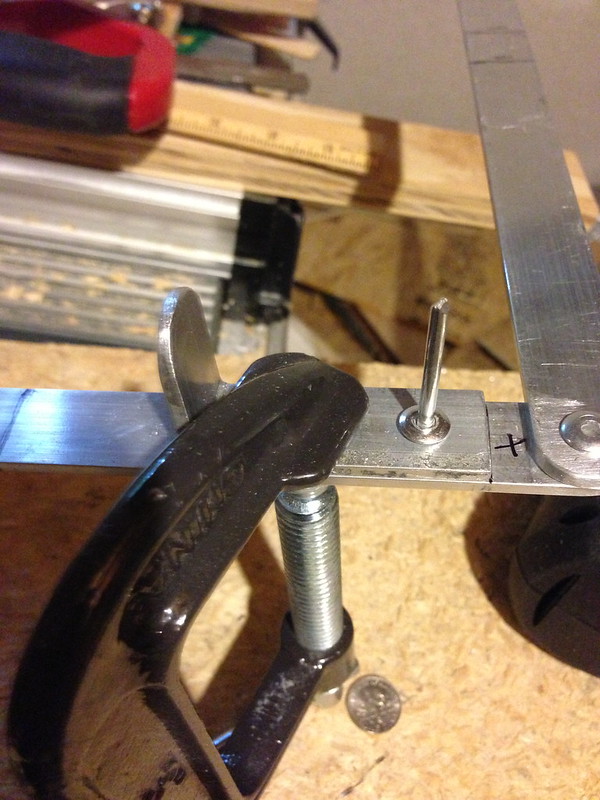
Followed by more trial fitting and measuring:
alt="bottom mount tab fitment check"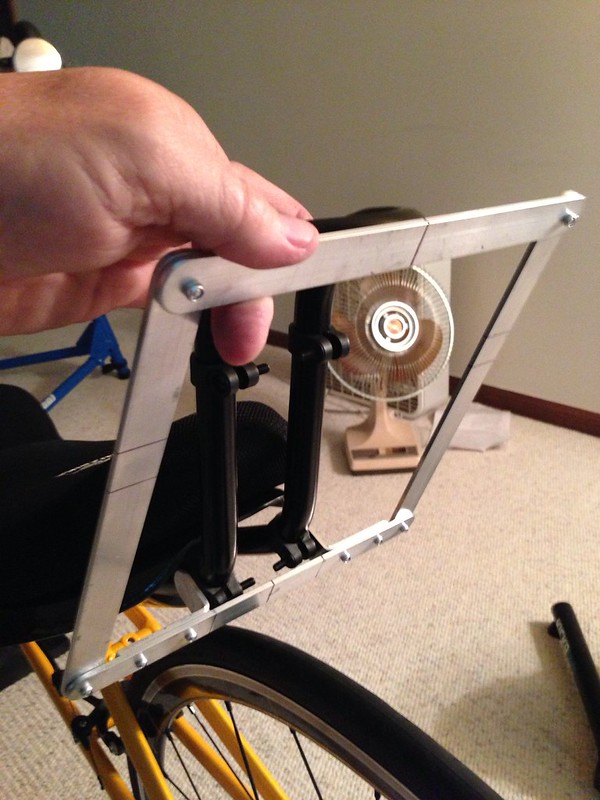
And several times trial fitting to locate the top mount tabs. NOTE: Clothespins make great little mini-clamps.
alt="top mount tabs being riveted"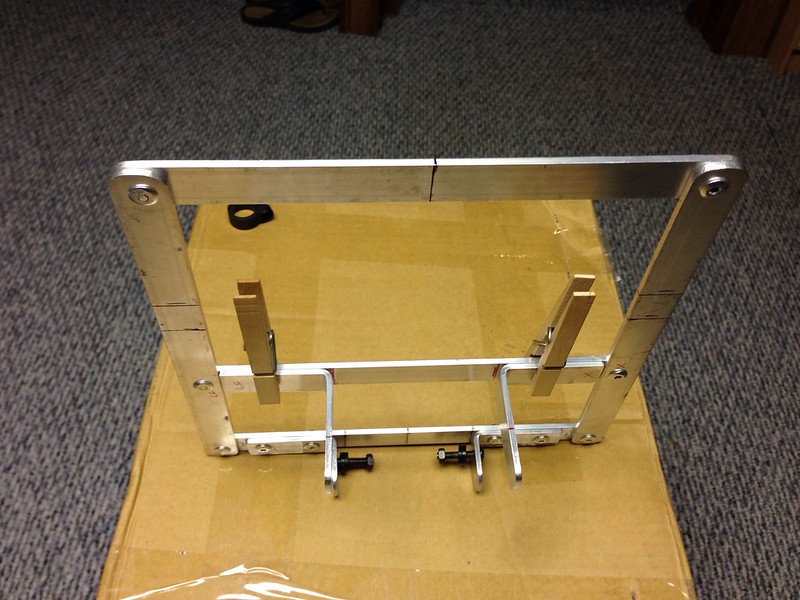
TIP: Figure out where the bolt holes need to be and drill them BEFORE riveting the tabs to the rack frame. You should also clamp the surfaces that will be drilled together before drilling to insure an even symmetry. I got lucky and was able to drill the holes but the bottom tab holes are not quite symmetrically located on this rack frame.

Finished frame:
alt="finished rack frame"
Frame mounted on the headrest tubs. NOTE: The cantilever position of the mount tabs was to avoid having to cut slits for the upper tabs in the BBB mount pocket fabric. The bottom edge of the mount pocket is a kind of upside down U shape. By setting the upper tabs low, the bottom edge of the pocket clears the upper mount tabs without having to create slits. The frame is rigid and strong enough to support the BBB with a 2L water reservoir, and various sundry other odds and ends that can get somewhat heavy. You can see the lines on the side frame pieces where I initially planned to locate the upper cross bar but I moved it down after some trial fitting and load testing to the position where it is currently riveted. I plan to monitor the frame for load fatigue indicators over time...
alt="mounted rack frame"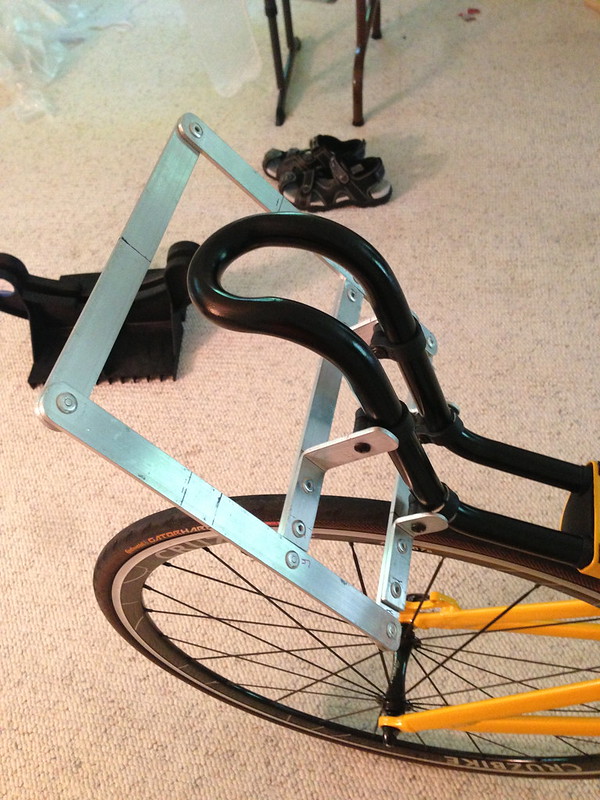
Left side view with the Bachetta Brain Box installed. Here you can also see my extra headrest padding - a bit of the white closed cell packing foam from my Vendetta frameset shipping materials. Alternatively you can also try the plastic air bubble tubes John Tolhurst mentions in another thread.
alt="BBB installed left side view"
Top view:
alt="top view of BBB"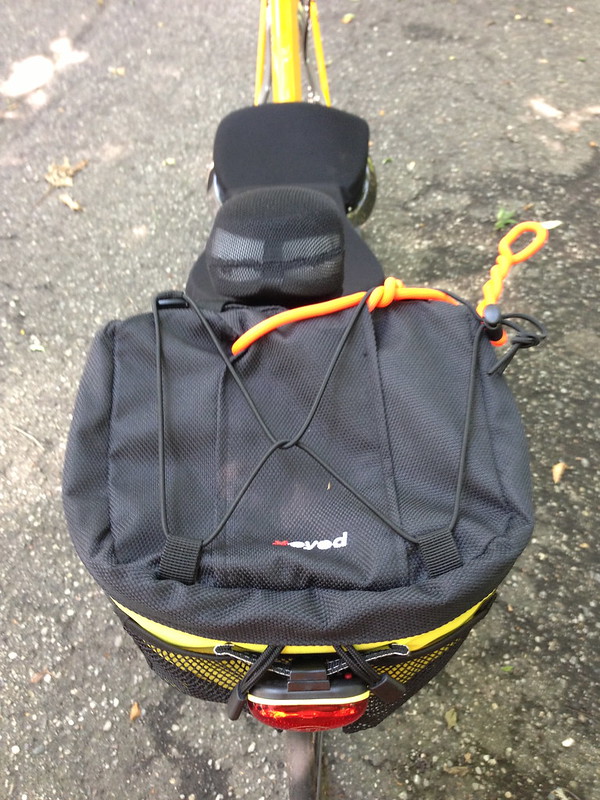
Bike right profile view:
alt="Bike right profile"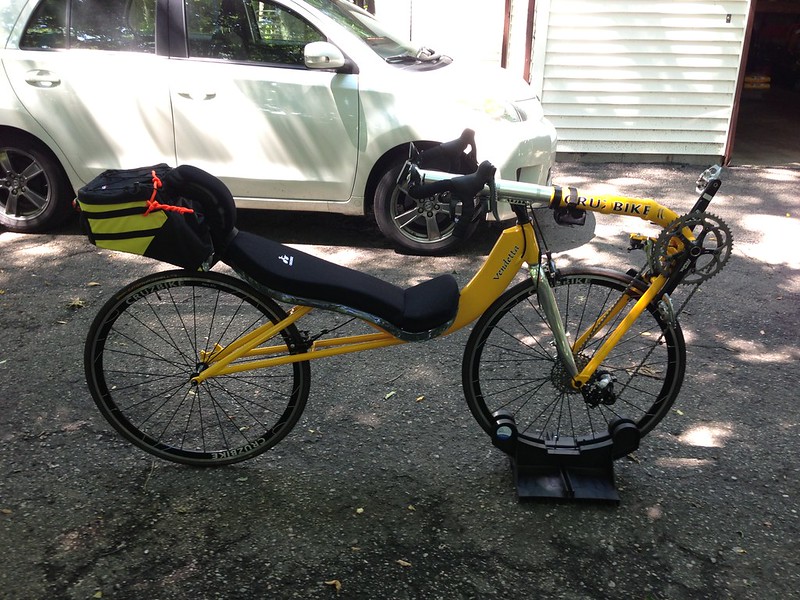
-Eric
My next plan is to figure out quick release mounts so I can quickly remove and install the rack frame on the headrest for when I don't want to ride with the BBB.
Long term plan is to build a quick release rack frame mount for a narrow custom bag similar to what John did for Maria's RAAM bikes sourcing material from something like this DIY Gear Supply store.
I originally slipped the mount pocket of the BBB over the entire Vendetta headrest but found these issues:
- The weight of the bag and snugging down of the retaining straps squished the headrest padding. The compression of the padding made it less comfortable but more importantly I had added a bit of closed cell foam to tilt my head just a bit more forward to what was a really good angle for me. The compression screwed this adjustment up.
- The back of my helmet was bumping into the stuff I have on the top of my BBB like the Gear Tie I use to route my drink tube . For example, I used this new mount during the N24HC and had the rider card fastened to the top of the BBB instead of with safety pins to my back like the DF riders have to do. Normally my helmet would have been bumping into the card edge.
- When mounted over the headrest the BBB bag was not very stable and would wag back and forth like a dog's tail a little bit during my riding.
Trial fitting the old clamps to the approximate position I thought I would use them in to determine how I would mount a rack frame to them:
alt="Trial fit of old headrest clamps"
I then measured the mount pocket of the BBB and cut out an oriented strand board (OSB) template:
alt="Oriented Strand Board template"
I did a number of test fits and trimmed the board a bit more until I was happy with the fit. Then I used some cardboard strips from my Gear Tie packaging to mock up an aluminum framework. I did this before buying 3/4"x1/8" flat aluminum bar stock at Home Depot. I again trial fit using the aluminum flat bar stock, especially since it was thinner than my test template cut from OSB.
alt="flat aluminum bar stock trial fit"
Once I was satisfied with the dimensions, I cut the bar stock into 2 side pieces at 9 3/4 inches long. A top piece at 8 3/8 inches long and a bottom piece at 9 3/8 inches long:
alt="aluminum bar stock lengths"
I used a penny to mark the end radius and then filed and sanded to get the rounded edges:
alt="penny to mark edge radius"
Then drilled and pop riveted the main frame pieces together. I already had a pop riveter but they can be picked up for under $20 if you don't have one. Just take care to understand rivet sizes and material and limitations of the pop riveter. For example, I used aluminum 3/16 inch 5mm rivets for this project. The same size rivet in steel will typically require a much more expensive riveter. The riveters in this price range will typically handle smaller steel rivets if you are working a steel project. You should not mix metals or you will induce galvanic corrosion.
alt="main frame construction"
Once the perimeter framework was together, I held this against the backrest to determine mount tab sizes and positions and then added the bottom mount tabs. NOTE: I already had a small sheet metal brake that I had picked up at Harbor Freight several years ago on sale for around $35. A sheet metal brake is a device for making bends in sheet metal. It worked well for this flat stock giving me very precise bends for the mount tabs. The bends turned out better with this 1/8 inch thick stock when I bent the aluminum slowly.
alt="bottom mount tab being riveted"
Followed by more trial fitting and measuring:
alt="bottom mount tab fitment check"
And several times trial fitting to locate the top mount tabs. NOTE: Clothespins make great little mini-clamps.
alt="top mount tabs being riveted"
TIP: Figure out where the bolt holes need to be and drill them BEFORE riveting the tabs to the rack frame. You should also clamp the surfaces that will be drilled together before drilling to insure an even symmetry. I got lucky and was able to drill the holes but the bottom tab holes are not quite symmetrically located on this rack frame.
Finished frame:
alt="finished rack frame"
Frame mounted on the headrest tubs. NOTE: The cantilever position of the mount tabs was to avoid having to cut slits for the upper tabs in the BBB mount pocket fabric. The bottom edge of the mount pocket is a kind of upside down U shape. By setting the upper tabs low, the bottom edge of the pocket clears the upper mount tabs without having to create slits. The frame is rigid and strong enough to support the BBB with a 2L water reservoir, and various sundry other odds and ends that can get somewhat heavy. You can see the lines on the side frame pieces where I initially planned to locate the upper cross bar but I moved it down after some trial fitting and load testing to the position where it is currently riveted. I plan to monitor the frame for load fatigue indicators over time...
alt="mounted rack frame"
Left side view with the Bachetta Brain Box installed. Here you can also see my extra headrest padding - a bit of the white closed cell packing foam from my Vendetta frameset shipping materials. Alternatively you can also try the plastic air bubble tubes John Tolhurst mentions in another thread.
alt="BBB installed left side view"
Top view:
alt="top view of BBB"
Bike right profile view:
alt="Bike right profile"
-Eric

