Is this a good donor bike?

BentAero

Well-Known Member
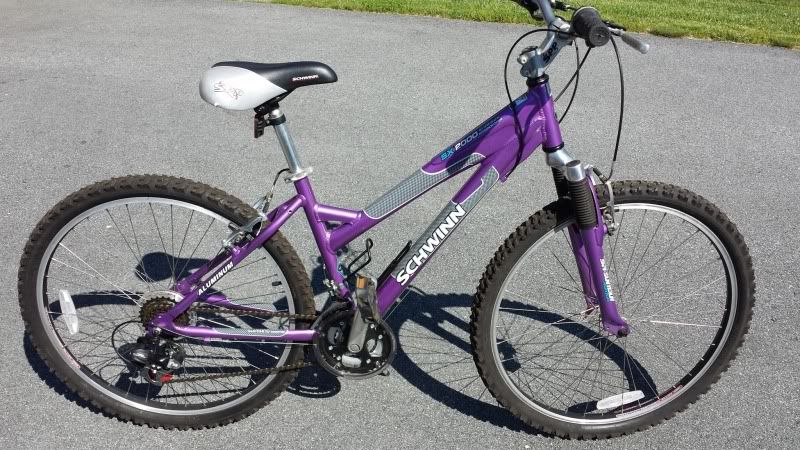
Found this prize... in my garage attic! My wife purchased this a couple years ago in a neighborhood garage sale for $15., it's brand new, probably doesn't have 5 miles on it. It's been collecting dust ever since.

Though it's "hydroformed aluminum", apparently it's the new lead-based aluminum as it weighs 32 lbs.

It seems to have all the right attributes for a conversion; threadless headset, V-brakes, dept. store seat post, etc, the wheelbase is a bit short, and I don't know if that's good or bad...

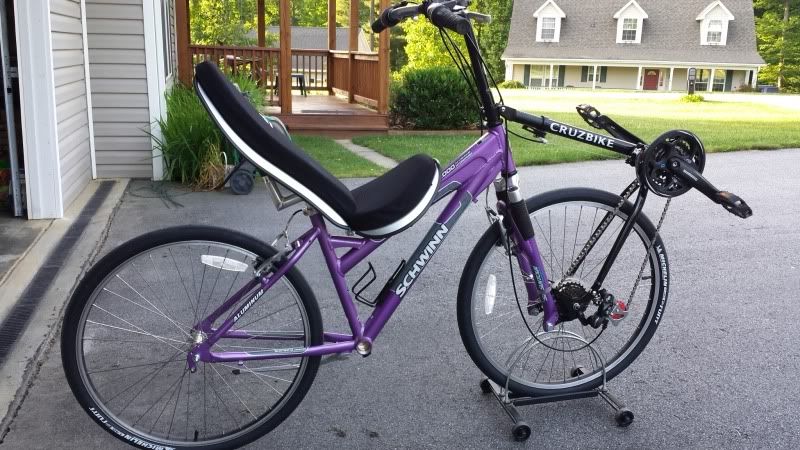
My goal is to do whatever it takes -including cutting and welding the frame, stem, seat mount- in order to make it a more layed back riding position similar to a Silvio rather than upright like a Quest.

This will be a fun toy to play with while I work on obtaining a Vendetta.

20140503_104848_zps9ea59f01.jpg
 

Charles.Plager

Recumbent Quant
Hi,
I agree with your


Hi,

I agree with your assessment. Everytime I see a bike like this, I have the urge to convert it to a Cruzbike.
 

Ian Smith

Member
Good bike

This looks similar to what mine started out like (except the front fork arrangement). The biggest challenge for the seat angle is the height adjustment. A layback will get you to the Quest angle. I found it prudent to re-grease the wheel bearings and put a new BB and front deraileur in as part of the build. Also give the cluster bearings a bit of lubrication because these bikes used lower end components that often give trouble if not kept lubricated.

Enjoy the build.
 

BentAero

Well-Known Member
Is there an ideal width to

Is there an ideal width to order when replacing the BB?

I see the shell is 68mm on the kit, but the OE BB seems really wide at 122mm... Go narrower? 118? 113?
 

Charles.Plager

Recumbent Quant
My Sofrider has a 123 mm

My Sofrider has a 123 mm wide. It need that for the triple I put on. The bottom bracket and the crankset need to agree, so I wouldn't change one without the other.

That being said, given the components on the donor bike, I can imagine upgrading lots of bits and bobs.
 

BentAero

Well-Known Member
The frame shape on this donor

The frame shape on this donor requires the seat to be positioned as far back as possible in order to keep the seat height at a minimum. Otherwise, my wife won't be able to ride it. That presented a problem with the seat post fitment. A bit of repositioning with a band saw and welder solved that...

20140511_184904_zpsc601c90d.jpg

20140511_185634_zpsdd40c6f6.jpg
 

Charles.Plager

Recumbent Quant
Huh.  That's pretty cool! (a

Huh. That's pretty cool! (a layback seatpost would have almost worked for you, but not quite as tightly).

So... Where are the pictures of the rest of the bike? :)
 

BentAero

Well-Known Member
I finally finished assembling


I finally finished assembling the kit bike. It had been neglected due to other projects, but with 'Project V' just around the corner, I knew if I didn't finish the kit bike first, I'd never do it this year. I literally just bolted everything on and took off riding it. The derailleurs didn't even need adjusting. Within minutes the headset came loose. Is that what the odd bolt sticking out of the riser is for? Anyway, all fixed. I doubt the wife will ever ride it.

20140608_193132_zps3f225205.jpg
 

Eric Winn

Zen MBB Master
Does the leading edge of the

Does the leading edge of the bottom seat pan dig into the backs of your thighs?

-Eric
 

BentAero

Well-Known Member
Yeah, a little bit, but not

Yeah, a little bit, but not terribly so. If one were riding long distance it might be an issue, but in the couple miles I rode it, it was barely noticeable.
Seat position/angle and boom length are far from optimized. I may have to 'raise' the rear of the seat pan to get less of an angle.
 

Charles.Plager

Recumbent Quant
Seat position/angle and boom

Seat position/angle and boom length are far from optimized. I may have to 'raise' the rear of the seat pan to get less of an angle.

Can you flip the seat pan around so the fat end is near the rear of the seat pan (is it like that already? Shims??).
 

BentAero

Well-Known Member
Yep, already did. I  could

Yep, already did. I could see early on that the normal way per the instructions wasn't going to work.
 

jimbo3b

Member
Well Done

Looks to me like you did a great job.

As I understand it, the theory on the odd little bolt you mentioned is that if it is adjusted properly, the non-sliding boom tube cannot drop too far below horizontal. That way if you forget to clamp the sliding portion it all won't come apart at speed. I did my best to adjust mine, but primarily made a note to self that this is a critical pre-ride check, along with tire pressure, etc.

On one of my conversions I used two cheap washers to space up the front of the seat pan (my tube was dropping, not rising). I had no stability issues--when I took the kit apart I found the washers had bent around the bike frame.

It looks like you may want an adjustment of up to an inch at the rear. An easy way to get it would be to take a short length of PVC pipe and slice it longitudinally, and stack a few pieces of different lengths to build a wedge under the pan.

I worry your seat post may end up being a little too laid back, but you can flip all the moving parts of the post clamp around and get back an inch or so.

Hope you enjoy the design as much as I have.
 
Top