Silvio 2.2 frameset build questions

brokemyback

Well-Known Member
New frameset arrived today. Yay!! Everything makes sense except the little bottle of glue? solvent? labelled "Contains Xylene". What is that for?

Second question - the collection of rubber tip things, one labelled "Jagwire". What are the rubber bits for, and where do they go?

I can't wait to get it assembled start learning how to ride!

IMG_4123_zpsarhjtdpo.jpg
 
Last edited:

Jeremy S

Dude
The bottle should be touch up paint.

The other bits -- I never used them but there may be appropriate cabling situations for them.
 

brokemyback

Well-Known Member
Maybe I'll turn this into some updates for the frame kit vs Silvio 2.2 assembly instructions.
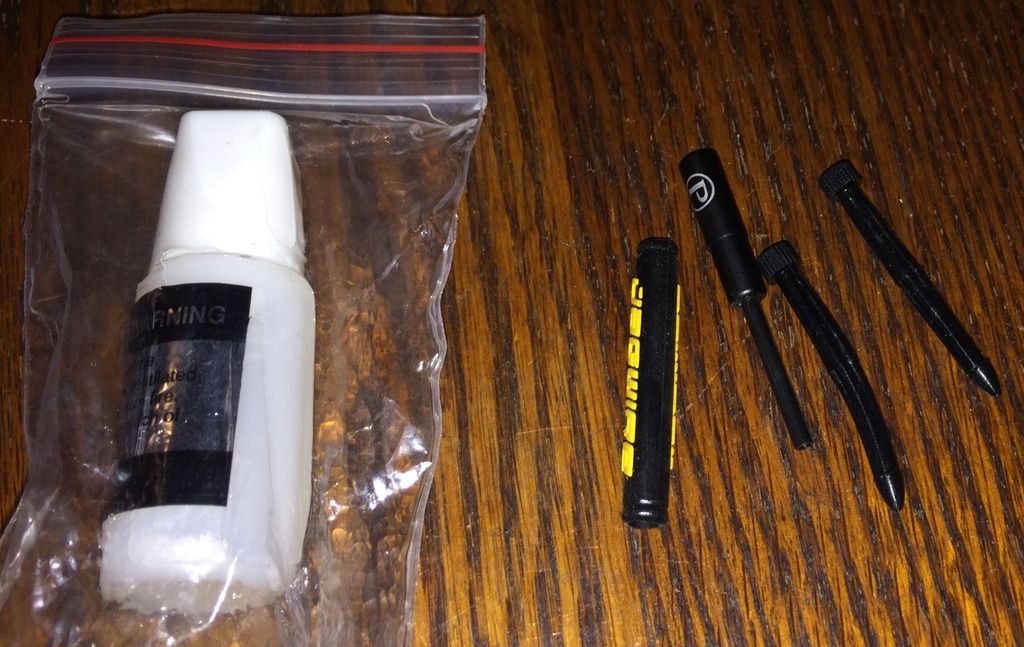
*The bottle contents I still can't figure out. I think xylene is a glue constituent. I opened the sticky bag and it's definitely not paint. Maybe extra glue for velcro strips?
*Instructions still show a two piece carbon seat pan. The bike kit has a beautiful one-piece seat now.
*The rear triangle and rear suspension are all pre-assembled. Nice touch! It means a lot fewer loose parts in the frame kit.
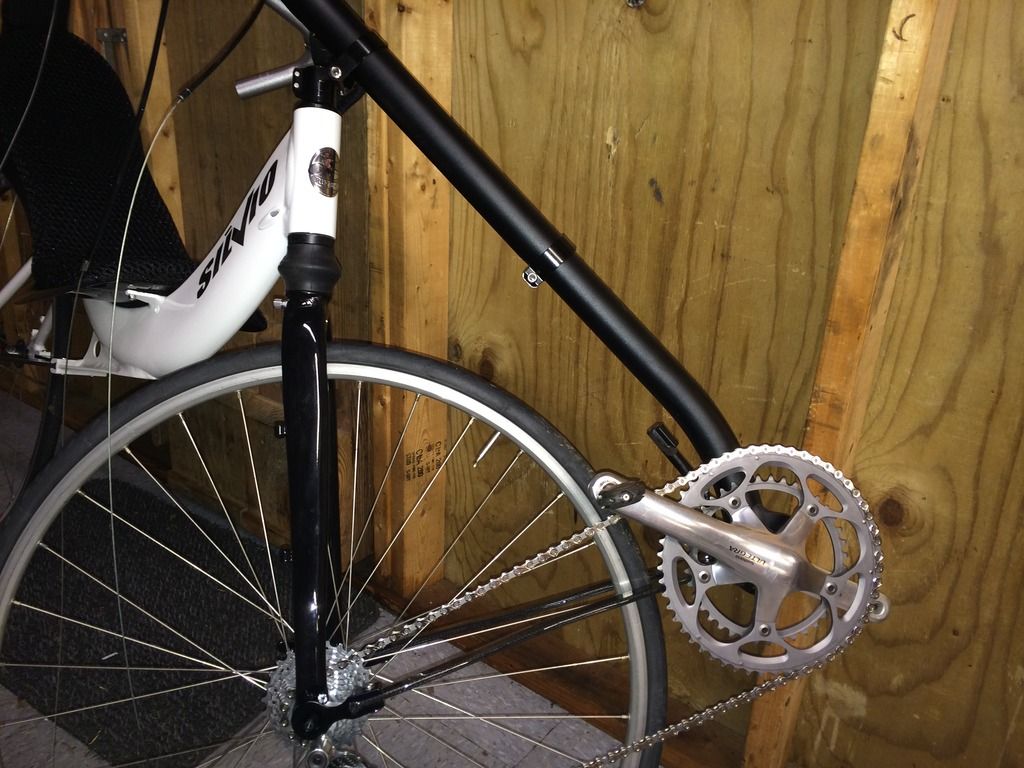
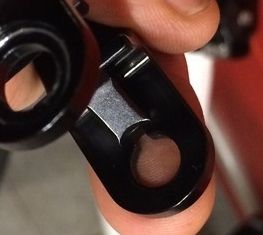
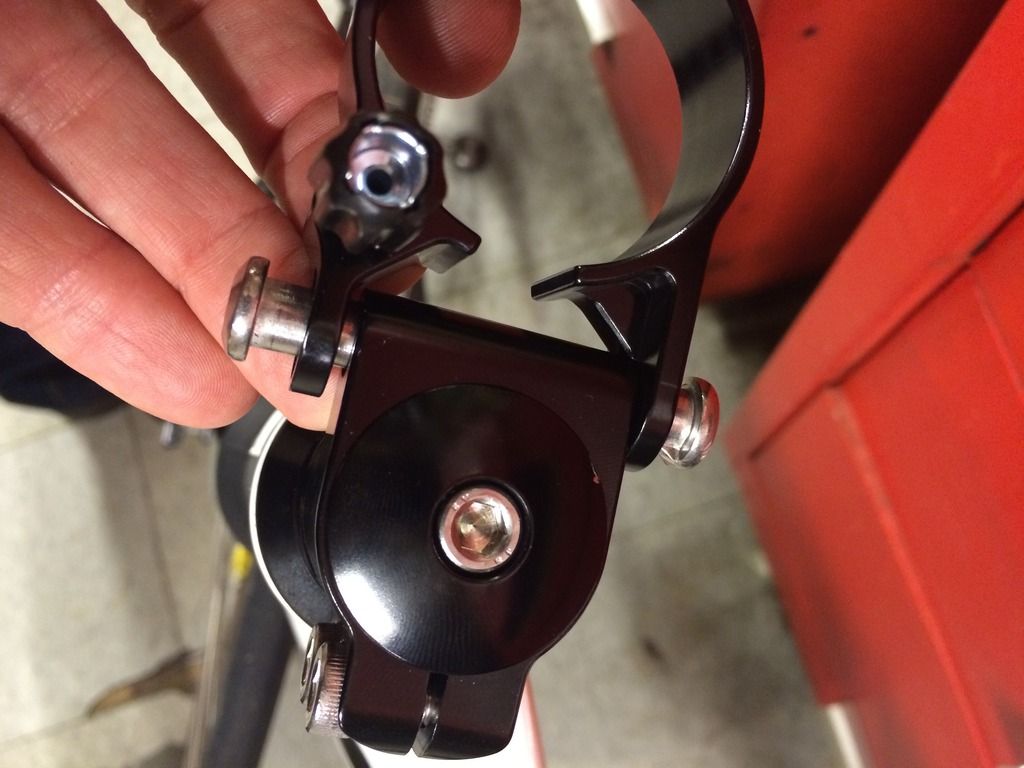
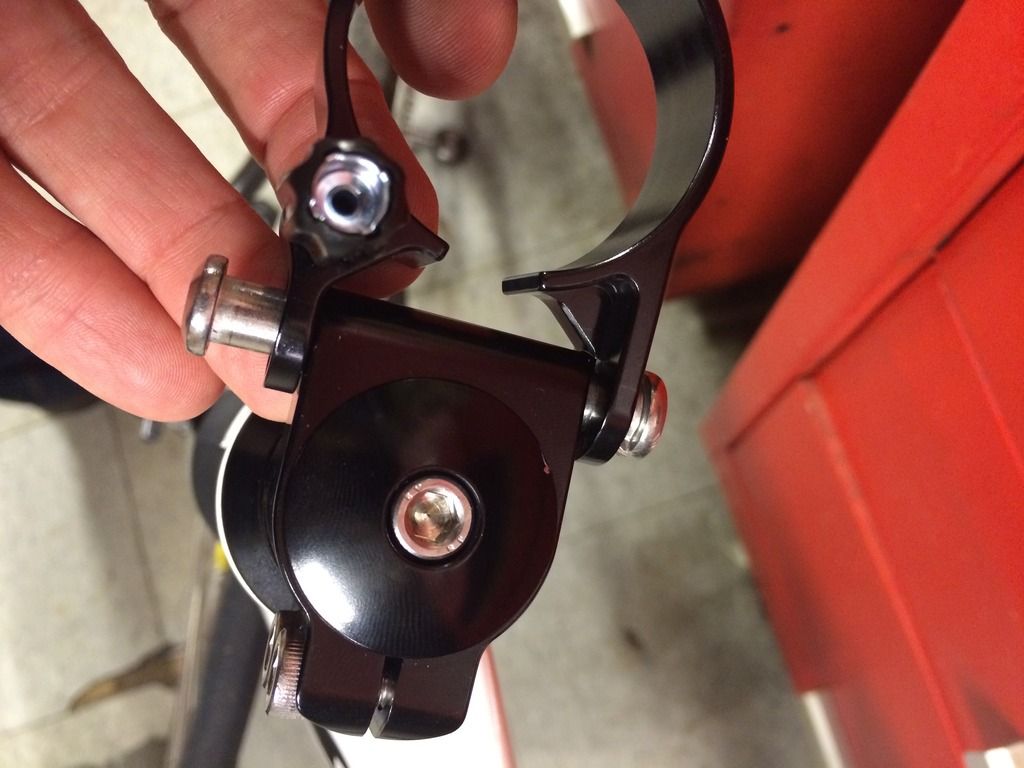
*My pivot clamp (fork item #1) was installed on the boom upside down. Simple to fix - but I'm terrible about reading directions. Too impatient!
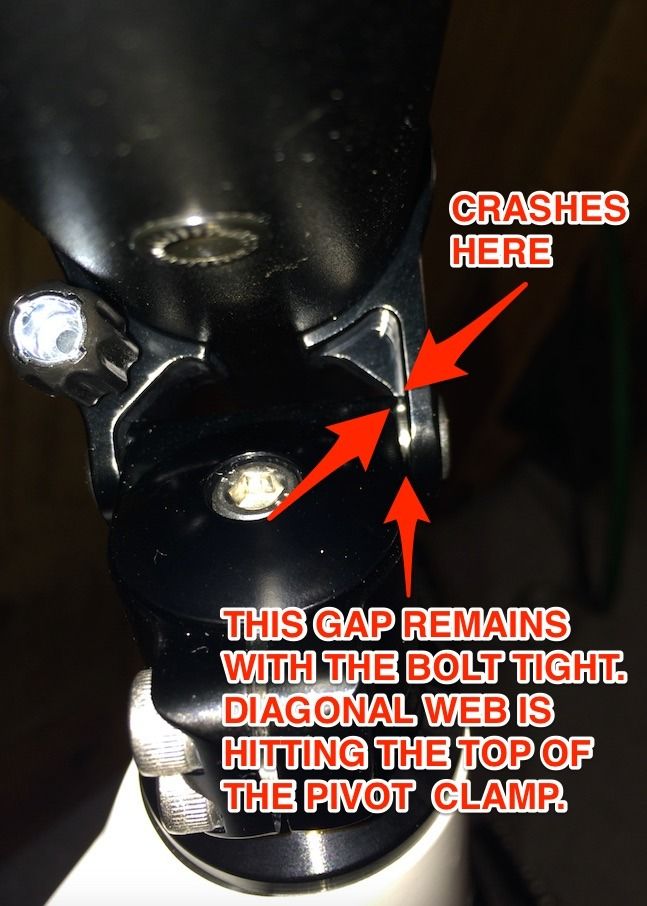
*The headrest clamps (headrest item #4) aren't made quite right. They need a flat mounting surface to avoid a pull-up gap when you attach it to the carbon seat, or it could crack the carbon/resin. I'll just add a few spacer washers. Four clamps were included in the kit, which is nice. But the seat only uses two.
*My BB clamps were missing one hex head screw. I hope I have one in the garage that will work, or I'm into a lengthy wait to order a matching screw for this critical joint.
*The rear derailleur hanger is supposed to click into place. It doesn't seem that tight. But lies perfectly flat with no play. AND the frame kit includes one extra hanger. Another nice touch!!
*One suggestion - number the parts with sequential numbers 1 through 54. The current system has a bunch of Item #3s, all different depending if they're off the Rear Triangle or Seat diagrams. etc.
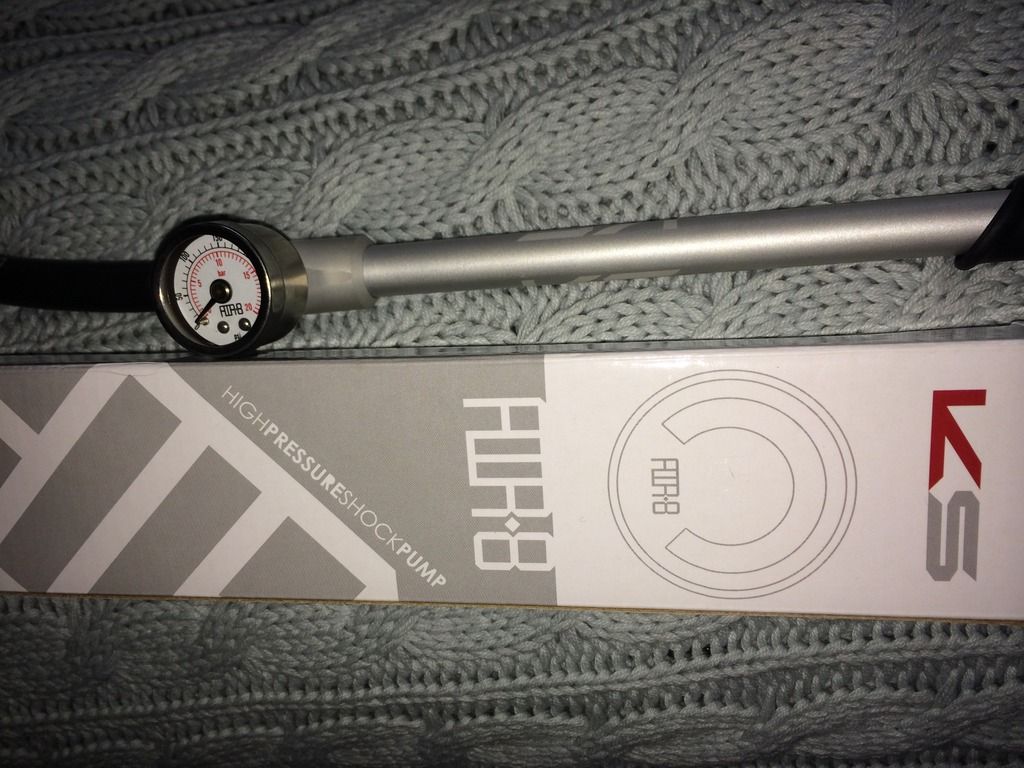
*Shock pump is included with the frame kit. Another nice touch!

Shock%20pump_zps7klcxkrc.jpg
 
Last edited:

ratz

Wielder of the Rubber Mallet
Saturday is wrench day!!!

Email support@cruzbike.com about the missing hex head screw. My guess is Robert will immediately hook you up; that's a critical bolt you really can't afford to use an almost match. It's metric, If you got lucky enough to find one in stock anywhere the rest of us would want to know where. Dam bike screws are so hard to match in the wild.

  • The bottle is paint; it's a heavy epoxy/enamel touch-up you have to shake it vigorously before using. When the bikes where black and yellow it was much more obvious, white does sort of leave you guessing. Given the black forks two colors should probably be included now. Any how It's like car touch up paint that we used in the 70's and 80's that might be why it's so unfamiliar nobody includes that with cars any more. It's needs to be so thick so it can fill in divots in the metal. Clear finger nail polish makes a nice top coat and will smooth out the paint just give it 10-20 seconds to set up and the apply the polish. Now ff you need to apply it I recommend not using the brush. Instead get a book of paper matches. Tear out a match and use the backside of the match (torn feathered paper makes a great one time brush) to apply the paint. I use to work an assembly line and my job was to tighten 3 bolts and touch up paint nicks before packaging. The match trick was always our go to tiny touch up brush for 100's of units a week. If you are going to be bored stupid it's best to learn to be really good at what you do.
  • The new seat is a thing of beauty is it not?
  • The rear triangle was assembled? Well that is a nice touch.
  • My pivot clamp was upside down too, fortunately you do have to remove it to do the build.
  • Headrest clamps, those are really a hack still; they are just standard bike clamps often used for taillight. A large majority of people don't even install them as the velcro does it's job all by it self. This also makes the seat pain easier to remove in the field if you happen to carry an emergency tube inside the frame. If you do use them; get some extra Textro Brake washers they work great for flushing those up.
  • The Hanger still needs to break free in a nasty crash to protect the frame, but the click into place should take, did it?

Next up Pictures!!!
 

ratz

Wielder of the Rubber Mallet
Ok as for those cable parts.

The frame rub protector goes over the rear brake cable and is used where the brakes cable leaves the boom area and go down and into the the body of the frame. When you turn the boom to extremes that brake cable will contact the frame and wear down the paint. When you run your housing; just slide it through this protector and get in in the general area. After you are all tuned up and your cable are finalized you can slide it to the right spot. If you turn out not to need it you can just cut it off. Depending on which protector you you got; it might be cut like a hotdog bun lengthwise, if it is; you can position it post build; and seal it in place with super glue on the seam.

The lined rear derailleur end caps there should be two; these also come with most road wiring kits so they may be redundant. You use these in the area of the fork where the cable runs without housing. Slide them into the cable stops and cut them to size: you want the thin lined end to stick out past the cable stop about 5-8 mm. Feed your cable through these. The liner in both cases will face the direction of the bare section of cable. IF you ride in wet and muddy conditions you will add the dust cover over the liner end. If you use the dust covers don't cut the liners use them at full length.

If should be noted that a-lot of people think that bar section of cable is to reduce drag and improve shifting feel. It does if you have a lot more open cable in your run. In the case of these frames it doesn't do that. There's just not enough open cable. It's main purpose is to make a small piece of house at the derailleur that is isolated from the rest of the system. This reduces torque imparted to the shift cable by the housing. If you impart strain on the upper part of the cable it won't cause the shifting to drift, but linear pulls still translate straight through.

You can for go the lined caps; but dirt in the cable stop will build up; it will ruin your cable even if you have good ferrels installed; eventually the cable will fray and break. The lined cap drastically reduces that.

Screen Shot 2016-02-06 at 12.05.57 PM.png
 

brokemyback

Well-Known Member
...that's a critical bolt you really can't afford to use an almost match. It's metric, If you got lucky enough to find one in stock anywhere the rest of us would want to know where. Dam bike screws are so hard to match in the wild...

Thanks for all the info!
I did find a hex socket-head metric screw in the garage, from a collection I got off aliexpress I think. Chinese stainless steel with no head markings, so probably of questionable strength. I just had to cut down the length to match.
I'm off to the garage for more assembly.
 

brokemyback

Well-Known Member
Correction - the derailleur hanger did click into place!
Question - can my BB not ride this low? I have it set right for my leg length, but the slider clamp webs crash with the top of the pivot clamp.

Steer_tube_crash_JPG_zpstur6thfh.jpg


BB%20height_zps82vuuu3l.jpg
 

ratz

Wielder of the Rubber Mallet
Correction - the derailleur hanger did click into place!
Question - can my BB not ride this low? I have it set right for my leg length, but the slider clamp webs crash with the top of the pivot clamp.

Steer_tube_crash_JPG_zpstur6thfh.jpg


BB%20height_zps82vuuu3l.jpg

You are a strong candidate for the chainstay extension.
 

brokemyback

Well-Known Member
Thanks to tips on the forum, I had planned to learn without the extension installed. I ordered one along with the frameset. I'll look into spacer washers before I give up on the non-extension build.

*edit*
My silliness! There is no crash. The slider clamp has a relief cut at the diagonal webs. It looks like it's hitting, but it's actually free to rotate to any angle without hitting. The boom can park at any angle without the slider clamp fouling the pivot clamp. Nice!

Relief cut:
96dfd209-0331-4ab1-9bc8-48e6f938191c_zpsggkuq64m.jpg


No crash! Gap is okay on either side.

image_zpsg3gufpyh.jpg


image_zps3due4yjk.jpg
 
Last edited:

gilpeel2002

New Member
You are doing very well in a short time. How long are your crank arms? Your knees look like they are bent more than 90deg. Shorter crank arms will improve that. I am 6'-4" and I use 165mm cranks. There are others here who use even shorter ones. The wisdom of tall riders and longer crank arms does not apply in the recumbent world.
 

brokemyback

Well-Known Member
Thanks for the tip! I haven't tried proper shoes yet, and I still have the boom set too short (for learning to balance!) I believe these are 170 or 175 cranks - taken off my DF bike. And 6'4" is exactly my height!
 

mzweili

Guru
I don't know if a lower bottom bracket helps for balance. A more upright seat position would help for sure.
I mesure 5'9'' only and ride with a 100mm chainstay extension, and 150mm cranks.
I couldn't try my new short cranks on the road, but when riding on rollers they feel ok.
 

Robert Holler

Administrator
Staff member
A 100mm extension would help for sure. The bottle there is touch up paint - but in my experience it rarely survives the journey from the factory.

Robert
 

TalleyHo

Active Member
I'm inspired to overcome my computer-phobic ways and come out of the shadows to add to this thread on fitting a tall rider to A Silvio. I'm also about 6'4" and have been very much dialed in to my Silvio. I was among the wave of folks who came in about this point 2 years ago who got the S 2.x model. I was convinced from the beginning that I wanted a bullhorn arrangement and a 150 mm extension and I'm extremely pleased with it. Also, if I'm able to post a pic, you'll see I have recently added a seat mod which has made a significant improvement. I mention the seat because that mod has ended up being a height related issue for me.

Actually, I just tried to post an image of this amazing Silvio but it's asking for a url and not sure what that is regarding photos; so if someone could advise I'd like to be able prove that it DID happen. But to continue regarding the seat, I used an M5 seat and what a difference it made! For me a disproportionate amount of my 76 inch height is with my back as apposed to legs (just 46 inch x seam) and the M5s in general are known to favor taller riders and their seat sure does. I managed well with the stock seat for most of 2 years but then neck issues emerged and I just happened to have M5 seat in stock that was slated for another bike mod project, a Reynold Wishbone Classic project that has been derailed by my CB interest.

Oh, maybe you can teach an old dog new tricks! Or maybe not?

P1010953.jpg
 

brokemyback

Well-Known Member
Ingenuity, very nice! The M5 seat has enough structural rigidity to support past the Silvio frame? I presume you removed the Silvio headrest tube.
 

TalleyHo

Active Member
Yes, the M5 seat, like many I suppose, is incredibly rigid and light and requires just 2 mounting points. I copied Rick Youngblood's method he posted in the fall. Quite an easy job. I did dispense with the headrest tubing although I thought I'd use it to mount the water bottle quiver but I ended up mounting a cage right to the new headrest (see image). The quiver still is an option by either modifying (cutting/bending) original headrest frame or use new tubing as there is good access to insert into main frame.P1010949.jpg
 

brokemyback

Well-Known Member
I haven't installed my 100mm extension yet. Now I see your 150mm extension. Where were those available? I only see 100mm available on the site currently. (and 7005 alloy is hard to weld!)
 
Top