Vendetta V20 Build diary 2016

ratz

Wielder of the Rubber Mallet
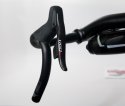
Next up brifters. Nothing elaborate here; place on the handle bars at the correct position. Mostly likely a temp position for now and tighten the clamp bolt.

DSC06068.jpg

SRAM has a reach adjustment screw on the side so you can find tune how far out the brake leavers stop. Very handy for people with smaller hands.

DSC06069.jpg
This has to be the first bike I have installed Brifters on AFTER having the derailleurs fully functional. That right there tell you that wireless is a game changer.

To finish the derailleur install. We needed to pair the brifters. Which as not hard at all. Press and hold the button on the RD until it flashes, Press and hold the FD button until it starts flashing. The RD will blink to tell you the FD is paired; press and hold the right shifter programming button until the RD flashed; repeat with the left shifter. Press the button on the RD and done.

If you need more details check out the 50+ how to videos on you-tube. Not sure why 50 people need to make video of that simple thing, but if you can’t find one you aren’t looking very hard.

DSC06026.jpg DSC06027.jpg DSC06025.jpg
 

ratz

Wielder of the Rubber Mallet
Ok now we have drive train to make us go fast, we need to get those brakes hooked up so we can stop. I find setting up brakes on the Vendetta to be simple to do but challenging on getting the correct parts. Since we are using road brakes we need road cables. But more and more road bike cable kits don’t include enough cable for a V20 build. Example E-tap came with a brake cable but it was too short for the rear brake.

So we need some extra bits to do a really good job. We are going to us compression-less brake housing from Jagwire on this build. In the lengths we need we have to buy a Mountain bike kit. But the mountain bike kit will have the wrong cable so we’ll need an extra universal brake cable to get one in the correct length.

lastly Jagwire’s Easy Bend connection make Brifter setup so much easier that we are going to use them too. They come included on the high-end road kits from Jagwire but of course we bought a MTB kit so we have to source them separating. A 6 pack is $11 and we need 3 per bike so perfect.

Included in all the various sub purchase will be plenty of the misc. accessories so we will have more of those than we need.
DSC06063.jpg


The first step is to install the ez-bend housing. Take the first two and install a brake ferrule over the small end. Brake ferrules are metals with the big hole. Do not use plastic ferrules; just don’t do it.

DSC06077.jpg
Install the ferruled end into the Brifter brake slot (which is easy on e-tap as there is only one). Tape to bars with electrical tap or with string tap. Slide your brake cables in to make sure there are no obstructions.
DSC06079.jpg DSC06080.jpg DSC06081.jpg
 

ratz

Wielder of the Rubber Mallet
Our rear brake is going into the top position. This leaves the lower triangle free for cargo. But the upper slot makes cabling really hard for just plan old cable. Due to the bend, It likely won’t brake smooth and the cable will wear on the frame. So we are going to make a flexi adapter.

There are two choices here we can use a 3rd ez-bend or we can use a traditional metal MTB noodle. If you choose the noodle. Cut the end off of it and slide on two Jagwire frame protects to cover all the metal. Grease the cable with cooking oil and they will slide right on.

DSC06075.jpg DSC06076.jpg

In this build we are going to use a 3rd ez-bend. The Jagwire frame protector will slide on the metal end with oil the rest of the cable is in a rubber sleeve and needs no protector.

DSC06082.jpg DSC06083.jpg
With the connectors all installed and prep it’s time to run the housing. Run the rear one first as that take the most cable. Feed it through the frame fork area first and out the back second. Be sure to get the cable into the channels for best braking performance.

DSC06070.jpg
DSC06072.jpg
Insert the ezbend into the rear brakeand insert the housing into the metal end with the frame protector.

DSC06086.jpg
DSC06089.jpg

Route the other end of the cable up under the boom clamp and on up to the handle bars. Use tape to hold it to the boom while you figure out the length of cable you need. Leave a lttle extra for future adjustment.

Again use cooking oil to slide on another frame protector
DSC06084.jpg
 

ratz

Wielder of the Rubber Mallet
Repeat the process for your front housing. Insert into brake and tape in place if necessary and then run up to the handle bar area.

DSC06096.jpg


With the housing ready we can now install the cable. Because we are using the ez-bend cables we can disconnect the cable at the junctions to aid in routing the cable.

Once the cable are routed connect them to the brakes and set you tension.
DSC06091.jpg
DSC06092.jpg

DSC06087.jpg DSC06090.jpg


To align your brake pads I highly recommend Jagwire’s brake pad alignment tool. Yes, you don’t need one; but it makes for perfect brakes ever time.
 

ratz

Wielder of the Rubber Mallet
Ok the final piece of the puzzle for now is wrapping the bar tape. Most people will spend a lot of time getting the fit right before they tape up the bars. Sufficient it to say that during this build the bike spent a lot of time on the indoor trainer so the fit is dialed in.

When wrapping a Vendetta or Silvio you are going to do it the reverse of a road bike; and you are going to skip the figure 8 because it makes the shifter base too big to be a bullhorn grip. Road bikes are wrapped inside->out over the top because they push down on the drops and that action of rotating the hands out will tighten the tap and keep it in place. If you reversed the wrap that force would unwind it. Cruzbikers on the other hand pull on the drops. So we need to wrap the bars outside -> in over the top. That way when you pull the bars the tape tightens and stays in place. If your wrap keeps falling off you did it backwards.

Roadies do the figure eight wrap on their bars because they can't do them in the parking lot.... ok really they do it add more padding so that when climbing on the hoods it doesn't unrave under weighted load. We on the other hand want less padding in that area so we can grab the bars like a bullhorn at the brifter's base. So we use a simple cross over that reverses the direction of the wrap

This much easier to show than it is to explain so I made you a video of how I do it. The tape used is Lizard skin 2.5mm which seems to be the optimal thickness for the Vendetta. There's also a cameo appearance of Mallet so what closely.


ratz

Wielder of the Rubber Mallet
Question
Do you have access to a Red22 rear derailleur? While out on the mtb today I had the idea that if the etap is basically 22 of electric steriods the it could be possible to swap the a med length cage from a 22 onto an etap and gain the use of a 32t cog. What are you thoughts on that idea?

The inside half of the cage is integrated right into the unit; and it's pretty much not removable unless you are really gutsy with releasing all the internal springs and parts. Pretty much the same as the Red and Force mechanicals. It looks to be designed to prevent users from doing exactly what you are thinking so that they can sell Wifli units.
 

RojoRacing

Donut Powered Wise-guy
The inside half of the cage is integrated right into the unit; and it's pretty much not removable unless you are really gutsy with releasing all the internal springs and parts. Pretty much the same as the Red and Force mechanicals. It looks to be designed to prevent users from doing exactly what you are thinking so that they can sell Wifli units.

I've taken the sram mtb stuff apart to that point and yeah the spring can be intimidating but it wasn't a big deal getting it back together. I totally understand someone not wanting to break down a brand new $500 part to that point though. :cool:
 

ratz

Wielder of the Rubber Mallet
I've taken the sram mtb stuff apart to that point and yeah the spring can be intimidating but it wasn't a big deal getting it back together. I totally understand someone not wanting to break down a brand new $500 part to that point though. :cool:

If you can figure out how you could make money because a lot of people want that mod. Errors would certaiy be a hazard to profitability.
 

ratz

Wielder of the Rubber Mallet
Regarding the Front brake. That thing is functionally amazing; I'm going to wait to get a couple of hundred miles on the road with it; but I'm already plotting how to make it work as the rear brake.
 
Regarding the Front brake. That thing is functionally amazing; I'm going to wait to get a couple of hundred miles on the road with it; but I'm already plotting how to make it work as the rear brake.
Would you be able to use the brake underneath the lower attachment point, like on the Trek Madone? I know aerodynamics would be slightly reduced and the brake would be exposed to road spray, but should work well.
 
Ratz, what's the maximum width those TriRig brakes can open up to. I built some wheels for a fixed gear bike with some superwide Farsports rims that are on the edge of usability with normal Shimano brakes. I've shaved the pads to get enough clearance but it's still tight. I am hoping those might be a litter wider.
 

ratz

Wielder of the Rubber Mallet
Would you be able to use the brake underneath the lower attachment point, like on the Trek Madone? I know aerodynamics would be slightly reduced and the brake would be exposed to road spray, but should work well.

I am contemplating the current top position or upside-down on either of the mounts as you suggest. Upside-down would preclude the aero cover being installed unless glue inplace with a breakable glue; I don't think the magnets are aggressive enough otherwise. But upside down removes my concern about the spring bar. More on that soon.

Ratz, what's the maximum width those TriRig brakes can open up to. I built some wheels for a fixed gear bike with some superwide Farsports rims that are on the edge of usability with normal Shimano brakes. I've shaved the pads to get enough clearance but it's still tight. I am hoping those might be a litter wider.

Pretty darn wide, 32mm

http://www.tririg.com/store.php?c=omega&page=features
 

ratz

Wielder of the Rubber Mallet
Regarding the Front brake. That thing is functionally amazing; I'm going to wait to get a couple of hundred miles on the road with it; but I'm already plotting how to make it work as the rear brake.

I lied; I order the one for the rear about 2 hours later. :rolleyes:
 
Great! Thanks. My Ultegra brakes only open up to 31mm with shaved pads. My rims are 28mm at the brake track. I guess I will have to try one of those.
 
Top