What I learned building out a pair of 2016 V20 Vendettas

I built out two 2016 V20 Vendettas for my wife and myself from framesets. I've had plenty of experience building bikes, but I haven't had any previous experience with Cruzbike. I'll append to this thread some of the things I learned along the way, with the caveat these might have been covered elsewhere in the forum...

image.jpeg
 
Steering tube/boom clamp

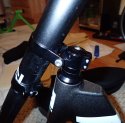
The steering tube/boom clamp doohickey (stem?) came from the factory installed on the boom incorrectly. This threw me for a loop for a while trying to put the triangle together. This photo shows the correct orientation for the clamp. The two provided steering tube spacers need to go below the stem so that the boom clears the top of the steering tube.

You have to lube the boom clamp bolt. The first time I put this together the bolt seized up without fully tightening the boom clamp. I ended up striping the hex head trying to loosen that bolt. Fortunately Cruzbike provides a couple extra clamp bolts with the frameset, so I drilled that one out and put a drop of oil on the next bolt. That made all the difference.

You will want to route your cables through the space in the stem/boom clamp to keep the cables away from your legs while pedaling.

Correct stem/boom clamp orientation:
image.jpeg
 
I'm having difficulty adding more than one photo to a single post. I may have to compress them more.

This is the orientation that came from the factory. You need to flip the steering tube clamp over.
image.jpeg
 
Boom bottle mounts

The V20 comes with bottle mounts on the upper part of the boom, which will be convenient for taller riders. However, these bottle mounts limit how far you can slide the boom together. Nancy is 5'3'' (160cm), so I had the choice of cutting the boom or removing the bottle mounts. Any bike shop can rivet bottle mounts back in so drilling those out was the fairly non-destructive option.

This photo shows the underside of the boom on my bike with bottle mounts still in place.
image.jpeg


On Nancy's bike with the bottle mounts removed, the boom can slide together.
image.jpeg
 
Front brake spacing

The spacing in the front fork is tight. I use 24mm wide rims, which is the current rage to provide better aerodynamics. I was also building with SRAM Force brake calipers. The fork does not have enough clearance so I had to get serrated washers to move the caliper out a bit. Two of these worked: Tektro Serrated Brake Washer #6.1x13.3 SB Silver

Notice the brake pad snug with the fork. This is with 2 serrated brake washers added to the SRAM force caliper. You can also somewhat see the brake mounting surface sunken into the fork. All the forks I've worked with before haven't sunken the mounting surface in like that.
image.jpeg


This (hopefully) shows the SRAM caliper spaced out from the fork with two washers to get the brake pad to clear the fork.
image.jpeg

These thick serrated washers work well and so far keeps the brake centered. The SRAM brake originally came with just one thin washer which wasn't sufficient. SRAM did provide a longer nut with the brake which was needed when the spacers were put in.
image.jpeg
 
Longer chain

Both our V20's have standard chainstays. I used a SRAM 1091 chain on mine and 1191 chain on Nancy's. Both our bikes are set up with 50/34 compact cranks and 11-32 cassettes. The standard length SRAM chain is not long enough and I had to add 4 additional links to each bike. The same set up on our DF works with a single chain.

4 extra links with the second master link, where a link is two pieces of the chain.
image.jpeg
 

Attachments

  • image.jpeg
    image.jpeg
    122.1 KB · Views: 1
Trainer skewer

The provided skewer is about 5mm longer than standard skewers. This makes it difficult to find a skewer that will work with the Kurt Kenetic trainer. I can hand tighten the skewer Kurt supplied and use it in the trainer, but it is not long enough to use the cam lock. I've gone through several skewers looking for one that I can just leave on the bike. There are skewers available that are long enough for the front triangle, but not enough of those skewers protude far enough beyond the V20's triangle to connect with the trainer. I guess I have to keep switching skewers each time we mount it back in the trainer. Sigh.

The triangle comes together with a deep recess in the outer chainstay. To connect with the trainer, a skewer would have to protude beyond the recess. This photo also shows the rear derailleur hanger pressed into the chainstay which will then get sandwiched between the fork and chainstay.
image.jpeg


This shows the Kurt Kenetic skewer hand tightened in, but not cam locked in. This works fine for the trainer but can't be ridden this way.
image.jpeg
 
I found a photo on my camera of the fork before the brake was mounted. This shows how deeply the mounting surface is recessed.
image.jpeg
 
Crank Arm length

When you buy a crankset, the typical crank arm lengths are 170mm, 172.5mm, and 175mm. Somehow the major drivetrain manufactures have determined that that 5mm range covers the cycling population. Nancy is 5'3''(160cm) and I am 6'(182cm) so I've always bought 170 for her and 175 for me without much further thought.

We live in North Carolina about a 4 hour drive from LarryOz but fortunately, only a few minutes from Larry's folks. So a Happy Birthday to Mom meant Larry came to town and brought his variable crank length crankset. Without using a power meter, using only perceived effort, Nancy tested different crank lengths and really liked 130mm. That was the sweet spot. Shorter than that started feeling wrong. 40mm (1.57 inch) is a big change, but made it so her knee was less sharply bent and ready to generate power when the crank rotated around.

I don't have a photo of Nancy's knee angle with the 170 cranks, but here is one with the 130 setting. She felt the stroke was smooth and she was much more ready to provide power. After fitting, we went outside for a ride (putting platform pedals back on) and Nancy very much liked the feeling of shorter crank arms. So we'll build her a 130mm crankset and have ourselves an extended test.

You can read more with Larry's write up here:
http://cruzbike.com/forum/threads/fun-with-crank-lengths.8536/#post-110263

Showing the crankset replaced with Larry's variable length crankset.
image.jpeg

Nancy's knees were in a much better position to apply power at 130mm.
image.jpeg
 
Bottom Bracket

The bottom bracket needs to have a very flat surface since the chainstay clamps onto it. SRAM's BB is made with a rounded surface and can't be used. I used a Wheels Manufacturing BB with replaceable angular contact bearings which as you can see in the photos has a very flat surface. I have a Wheel's PF30 BB on one of my other bikes and the Enduro angular contact bearings are silky smooth. Those bearings are double sealed and are replaceable.

image.jpeg

image.jpeg

image.jpeg

image.jpeg

Very flat surface.
image.jpeg

First position the chainstay over the boom, then screw in the bottom bracket. Note that the cranks rotate in one direction and then the bearings roll over in the opposite direction, so the tightening force on the bottom bracket is always opposite the crank direction. One side of the bottom bracket has right handed threads, the other left handed threads, but both sides tighten in the opposite direction from the crank rotation.
image.jpeg

With the chainstay clamped onto the bottom bracket
image.jpeg
 

Bruce B

Well-Known Member
Concerning the steerer tube clamp spacers.
IMG_0521.JPG
At my height (168cm) I wanted to lower the handlebars as much as possible to get the best forward view and to lower the position of my hands. I shortened the steerer tube and did not use the spacers when installing the steerer tube clamp.
 

Robert Holler

Administrator
Staff member
On my personal V20 I have cut the steer tube as well to only use one small 2mm spacer. Between that and the curved slider the bars can get rather low.

Also, just a bit of an edit for you - but the slider is the part that carries the handlebars, and the boom the bottom bracket. At least thats the "official" terminology. o_O

And the orientation of the clamps from the factory is something that will be fixed on the next batch.

Robert
 

jond

Zen MBB Master
what a great story (so far :) lots of great times to come) thanks for sharing and good for you Larry. cruzbike community . alright stuff.
 
Thanks Bruce and Robert, I can see trimming down the steering tube would be quite useful for Nancy. I'll probably do that in the near future. So far I've tried to be as non-destructive as possible, you know, in case she doesn't fall in love with it.

Thanks Robert for the terminology clarification - boom and slider.
 
I have one more that maybe Robert can answer. With the bag of parts that came with the frameset were 4 plastic clamps which fit the headrest tubing. And there were predrilled holes in the top of the seat. It looked like I should use the clamps to stablize the seat, but the supplied bolts were too short. I bought some longer ones and affixed it, but I don't know if that is correct.

image.jpeg

image.jpeg image.jpeg
 

Robert O

Well-Known Member
I have one more that maybe Robert can answer. With the bag of parts that came with the frameset were 4 plastic clamps which fit the headrest tubing. And there were predrilled holes in the top of the seat. It looked like I should use the clamps to stablize the seat, but the supplied bolts were too short. I bought some longer ones and affixed it, but I don't know if that is correct.

View attachment 1617

View attachment 1618 View attachment 1619
On my V20, I added spacers between the seat shell and those clamps, so that the clamp compresses around the neckrest support. Each clamp got one nylon spacer (drilled for 5mm), and one 1/2" plumbing flat washer.

Upper seat bracket.jpg
 

ratz

Wielder of the Rubber Mallet
Longer chain

Both our V20's have standard chainstays. I used a SRAM 1091 chain on mine and 1191 chain on Nancy's. Both our bikes are set up with 50/34 compact cranks and 11-32 cassettes. The standard length SRAM chain is not long enough and I had to add 4 additional links to each bike. The same set up on our DF works with a single chain.

4 extra links with the second master link, where a link is two pieces of the chain.
View attachment 1600

To get more reliable shifting and chain wear; I'll use 3 chains to make 2 (or 5 to make 4 for a waxing rotation);. Going with that approach I crack the chain is such a way that the master links are more opposite each other on the chain circle. When the master links are as close as pictured here I find the chain is more prone to an over-shift going to big ring and miss-shifts in general

1) Take chains 1 crack it in the middle.
2) Take chains 2 and 3 and crack at middle plus 5-10 links
3) set aside short sides from step 2.
4) combine long sections with chain halves from step 1
5) size chains using big ring, big ring technique http://www.sheldonbrown.com/derailer-adjustment.html#chain and shorten the longer segment as needed to get precise fit. Not that as pictured in that technique the Master link is on the chain

If making 4 chains for rotation; use the short pieces from step 2; attach to two additional full chains; and again size and fit by shortening the longer sections to keep the master links as far a part as possible.

Of course using bulk chain would be even better but not reasonable.
 
Last edited:

LarryOz

Cruzeum Curator & Sigma Wrangler
By the way, I just want to give big Kudos to both Doug and Nancy. After figuring out what crank length might work a little better we drove out to a nice low traffic road and rode around for an hour or so. Both Doug and Nancy are riding their Vendetta's like "old timers" already! Great balance, control and speed. It took me 10 days before I ever wanted to be on a road with something larger than me to hit!
Can't wait to see what they do when they "really" get the V's dialed in and are fully acclimated!
 
Top